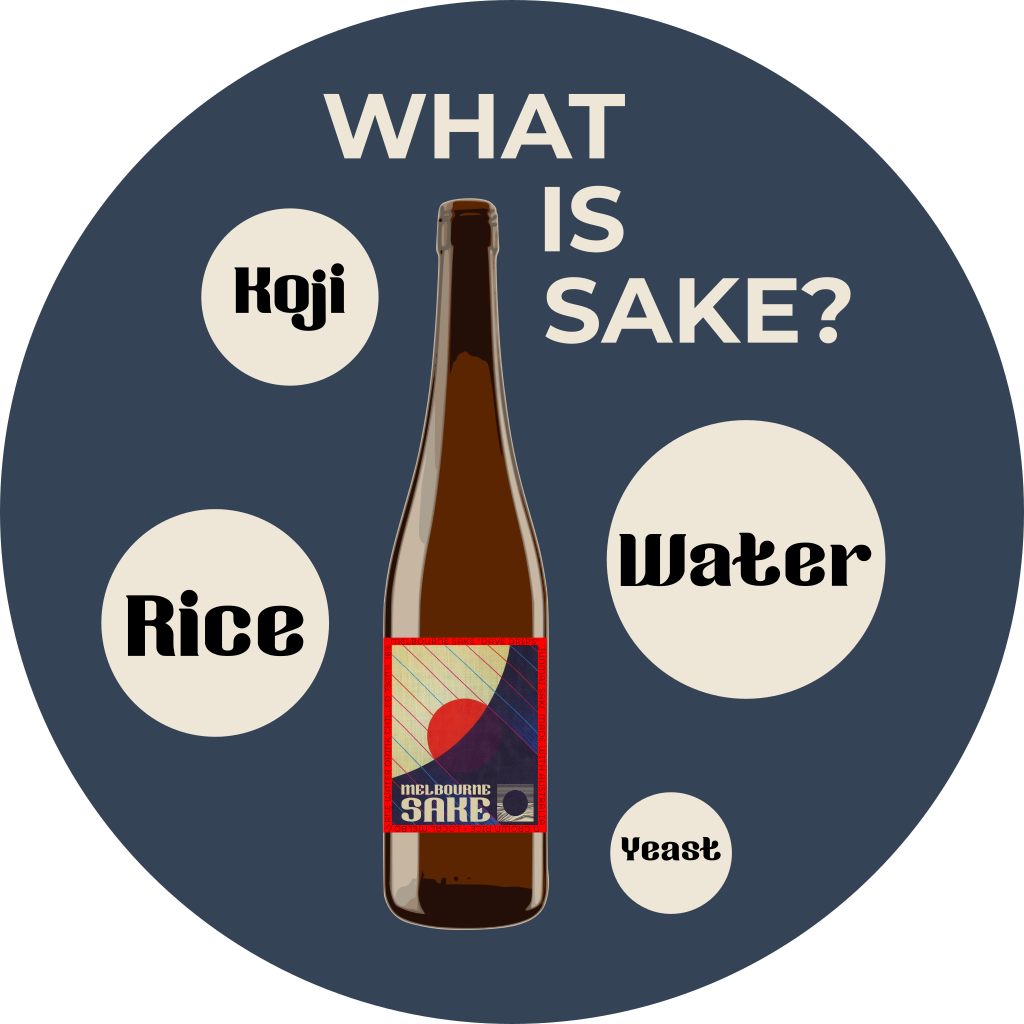
Rice is the crux of what makes sake, sake. Humans, in their never-ending quest to consume tasty things and get pissed, have long been fermenting whatever they have available to make booze. Asia has rice. Lots and lots of rice.
So, for 1000’s of years, people in Asia have been producing rice-based alcoholic drinks. China has Huangjiu and Baiju, South Korea has Cheongju and Soju and Japan has Sake, Shochu and Awamori. Pretty much every Asian country has its own equivalents, some of it distilled into spirits, some of it brewed like sake.
Rice is the primary ingredient of sake. It cannot be made from any other grain. In Japan, there are over 300 varieties of rice, an overwhelming majority of which is short-grain, with the conveniently intuitive botanical name of Japonica Rice.
Amazing sake can be made from table rice (the sort people frequently eat), but a lot of premium sake is made from sake specific varietals. Some rice varieties like Koshi-hikari are highly respected for both eating and sake making. There are around 120 rice varietals that are approved for sake in Japan, with a dozen being responsible for a vast majority of sake production.
Sake Rice Versus Table Rice
Historically, sake was only made from the same rice that people frequently ate. Sake was made from excess rice from good harvests and was seen as a gift from the gods that allowed such bounty. Over time specific rice types were noticed to be better for making sake and subsequently cross-bred to create varieties that were even more desirable for the specific production of sake.
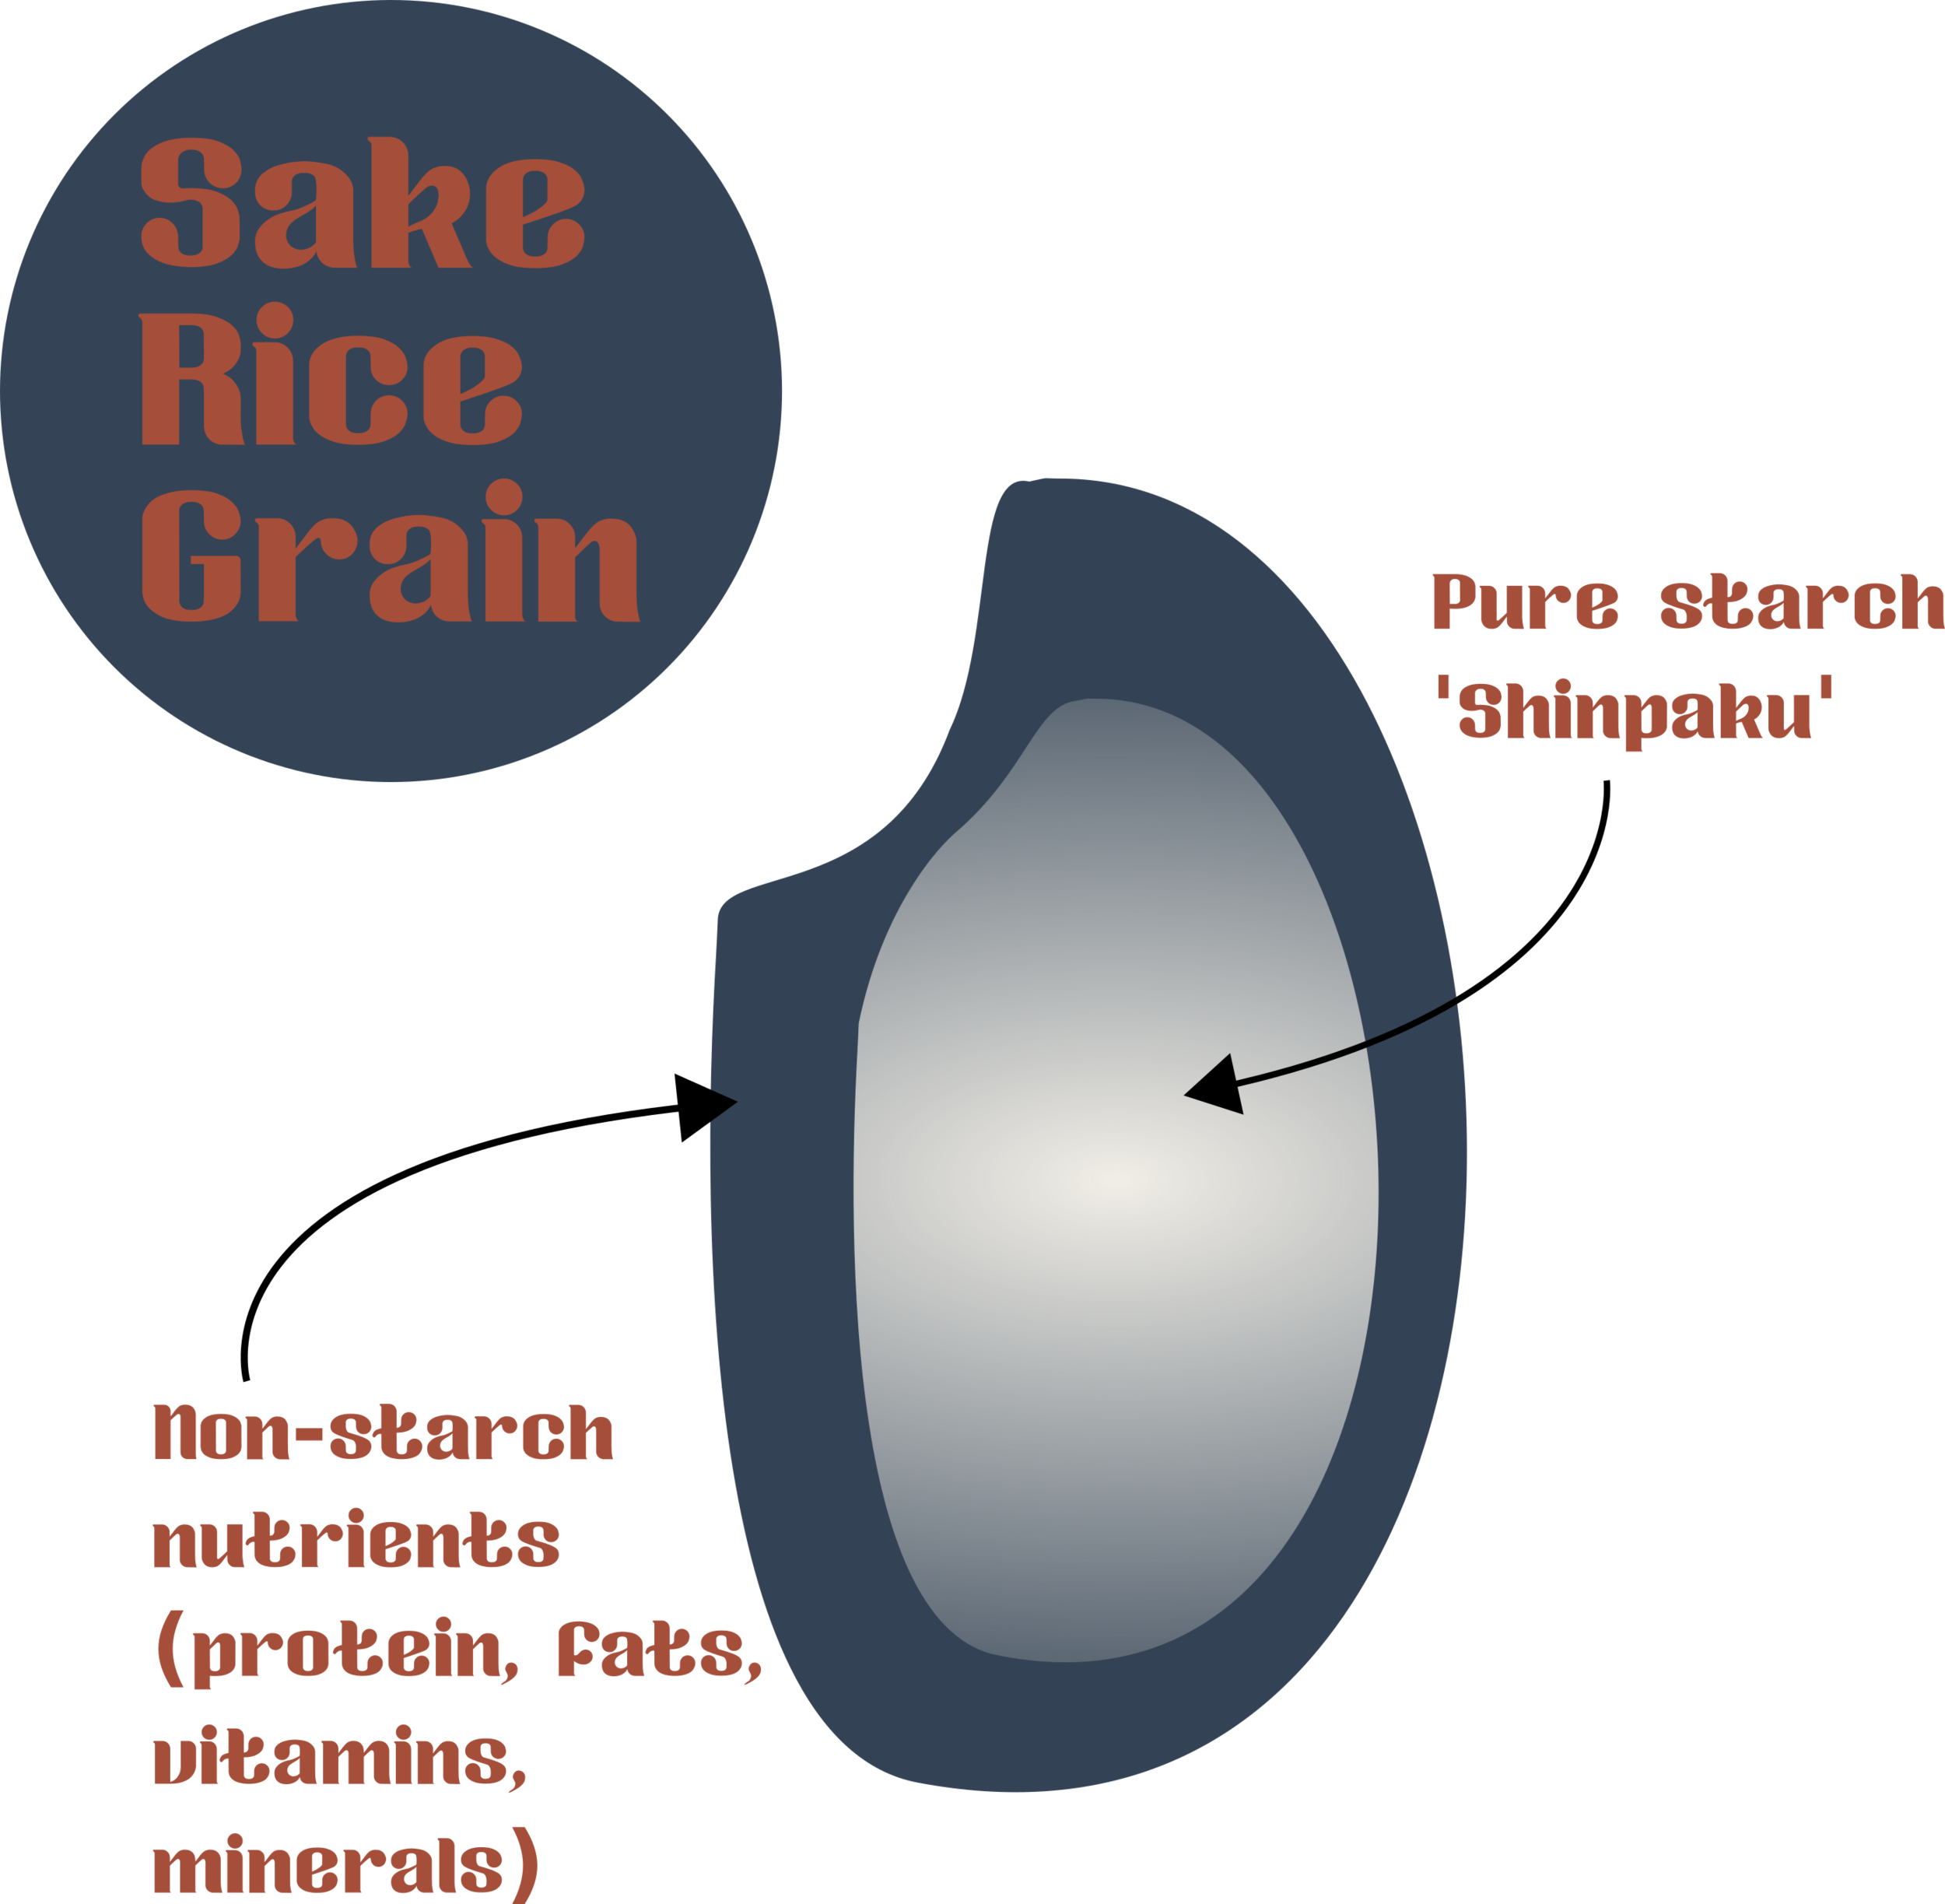
Sake specific varietals differ from table rice mainly in the way the individual grain is constructed. Table rice’s nutrient content (starch, protein, fat, vitamins, minerals) is spread throughout the grain relatively evenly. These non-starch nutrients provide flavour and are why they taste good.
Sake rice tends to have less non-starch nutrients, with the starch concentration in the core of the grain. This defined starchy core is called the “Shinpaku” in Japanese, which translates as the ‘White Heart’.
Polishing
The reason the shinpaku is important is that rice used for sake brewing is almost always polished to remove some (or all) of the outer layer of non-starch nutrients. The proteins, fats, vitamins, and minerals in sake fermentation can affect the aroma’s, flavours, colours, and acidity of the sake.
This isn’t necessarily a bad thing, some of the most flavourful and interesting sakes are made from minimally polished rice. However, the more non-starch elements present in the sake fermentation, the less control the brewery has, and the less clean and precise the sake is likely to be.
How much the rice has been polished is so influential in how the final sake often tastes that the polishing rate (Seimaibuai) is the defining factor in sake categorisation.
Polishing Rates (Seimaibuai) and Sake Categories
Junmai – is polished to a maximum of 70% (30% of the grain removed)
Junmai Ginjo – is polished to a minimum of 60% (40% of the grain removed)
Junmai Dai-ginjo – is polished to a maximum of 50% (50% of the grain removed)

Style: What Polishing Rates Usually Mean
Junmai – tend to be the most rich, robust, cereal, and savoury with the highest acidity.
Junmai Ginjo – tend to be cleaner, crisper, and more aromatic with lower acidity.
Junmai Dai-ginjo – tend to be lighter and more delicate still, with the most profuse aromatics.
These categories based on polishing rate frequently get equated to quality, with Ginjo touted as more premium than Junmai, and Dai-ginjo more premium still. This is extremely unfortunate as really these terms and classifications should only be used to differentiate and understand the stylistic variations. To say Ginjo is inherently better than Junmai is akin to saying all lager is better than all pale ale or that the longer every whisky ages in oak the better it is. I.e complete and utter nonsense.
N.B This article deals with the classification and naming conventions of “Junmai” sake. Junmai translates as “pure rice” and describes a sake that is made without any addition of extra alcohol. Junmai is the traditional style of sake (with added alcohol “aruten” sake only invented post World War II), the kind of sake we are interested in and the kind of sake we make.
Important Rice Traits in Brewing
Aside from the shinpaku being large and well-defined, these are the other factors that contribute to sake rice varietals desirability for sake brewers.
Size of the grain – this goes hand in hand with shinpaku in that the larger the grain is, usually the larger and more defined the shinpaku is, making polishing (and to which specific degree) easier. Sake rice grains are significantly larger (15-50%) than most table rice varieties
The texture of the grain – texture is important in the ease of polishing. Hard grains that don’t crack are ideal. If the grain is too hard it is likely to crack and you won’t get a uniformly polished grain. If the grain is too soft polishing to a precise degree is extremely difficult
Ease of growing – this is an important consideration for brewers, as whilst they rarely are involved with the growing of the rice themselves, they do want to be able to have a reliable source of rice to use for the coming season
Absorption rate – consistency and predictability with how much and how quickly the rice grains absorb water is highly valued as it makes brewing significantly easier
Melting rate – consistency and predictability with how much and how quickly the rice breaks down during fermentation is highly valued as it makes brewing significantly easier
Inherent character – the aromas and flavours that the rice is capable of producing in a sake fermentation.
Rice Types Influence on the Final Sake
The type of rice used in a particular sake certainly influences the final sakes aroma, texture, and taste of the sake in your glass. We will deal with some of the particularly common rice types and their common characteristics below.
It is important to understand however that the rice varietal used is often much less influential, direct, or obvious in its role in how a final sake tastes when compared with how wine grapes influence the final wine. Wine grapes have significantly more colour, aroma, flavour, and acid compounds than rice, so their inherent character influences the finished wine far more than rice does a finished sake. Decisions that the sake brewer makes when making sake tend to influence the final product more than the rice variety itself.
Different types of Sake rice
There are around 120 varieties of rice in Japan that are permitted for sake production. Of those 120, around 12 accounts for a vast majority of fields planted to sake rice varieties and sake production. Below we will go through the ones you are most likely to encounter in your sake drinking escapades.
Yamada Nishiki (Ya-ma-da Nish-key)
Main Production Area: Hyogo (South West Japan)
Production % of all sake rice grown in Japan = 30-35%
Known as the “King of Sake Rice”*, Yamada Nishiki is the most popular varietal of sake rice. It has been around since the 1930s and remains popular for many reasons. The grains are large, with a well-defined starch core (shinpaku) and don’t crack easily when polished. This means polishing Yamada Nishiki down to lower polishing ratio’s is easier and more consistent. Yamada Nishiki also tends to be the most predictable year on year in terms of how it behaves in the brewery, in terms of absorption rate, in koji making and in melting rate during fermentation.

A handful of polished Yamada NIshiki showing the size of grain and uniformity possible
Sakes made from Yamada Nishiki tend towards having depth of flavour, which flows across the palate. Texturally generous but capable of delicacy and precision. Aromatically light in intensity but flavour wise I often fine a billowing rich vanilla flavour.
* The “king of sake rice” moniker has got somewhat muddied from its intended meaning. It is the “king of sake rice” for brewers, as it is the variety that is most easy and consistent to work with. It is not the “king of sake rice” in the sense that it is the rice that always makes the best sake. Cabernet Sauvignon is the worlds most planted grape variety, because it is capable of making decent wine when grown in a wide variety of environments, with a wide variety of treatments, at high yields, not because it is the necessarily always makes the best wine.
Gohyakumangoku (Go-yak-uu-man-go-koo)
Main Production Area: Niigata and neighbouring prefectures on the west coast of Japan.
Production % of all sake rice grown in Japan = 25%
The second most common sake rice. Gohyakumangoku means “five million Koku” (Koku being the traditional and still used standard measurement of sake production in Japan, equalling 180L) as this commemorates sake production exceeding this total in 1957 in Niigata, the year Gohyakumangoku was registered as a sake varietal.
With a large grain that is slightly smaller than Yamada Nishiki but with a large and well-defined shinpaku, Gohyakumangoku also behaves very well when polished. The rice tends to break down a bit less in fermentation than Yamada Nishiki, so the flavours and textures tend to be lighter.
I often find a cucumber and green melon character in sake made from Gohyakumangoku, especially on the nose.
Miyama Nishiki (Mi-ya-ma Nish-key)
Main Production Area: Nagano (Mountainous Centre of Japan) and Tohoku (Mountainous North East of Japan)
Total of Sake Specific Rice Used = 10%
The third most popular strain of sake rice in Japan was bred in 1978 in Nagano to be especially hardy in cold growing conditions, hence in popularity in its chilly place of origin and further north.
One of the hardest to differentiate inherent rice influence versus brewing traditions and preference. Sake from mountainous regions developed as richer and more robust as a) it pairs better with the preserved fish, meat and vegetables that makes up the traditional cuisine of the area and b) by the time the sake was transported to the main market of Tokyo, it has been aged for a long time and thus had a more developed flavour. This became its market differentiating point and thus this style came to define sake from the area, made from Miyama Nishiki.
So, irrespective of the true origin of the main influence, sakes made from Miyama Nishiki are commonly rich, robust, ricey, and have a gentle sweetness to them. Aromatically light but strongly flavoured and with a generous round texture.
Omachi
Main Production Area: Okayama and neighbouring South Western prefectures
Total of Sake Specific Rice Used = 2%
The oldest known sake specific variety used today was registered as such in 1866. Omachi has an extremely large grain and shinpaku but is more prone to cracking when polishing than Yamada Nishiki. It is also harder to grow than most sake specific rice types, with its extreme height causing it to fall over easily in strong winds.
The difficulty in growing it, combined with other rice varieties being bred that were easier to work with, led to the near extinction of Omachi. In the 1970’s there were as little as 6 hectares (around 8 soccer pitches) being grown in the whole of Japan! Luckily there has been a big push to save Omachi, starting in its native Okayama prefecture and it is now the 4th most planted variety in Japan.
Sakes made from Omachi tend towards being richly textured, earthy, spicey, umami and herbal. I find a characteristic white vermouth/”gin-without-the-juniper” botanical character to sakes made from Omachi.
Outside Japan
For those brewing Sake outside of Japan, options of which rice to use are often a little more limited than within Japan.
In the USA, they are lucky enough to have some of the sake specific varietals (and the means to polish them) mentioned above grown in decent quantities, as well as table rice varieties such as Calrose, that a majority of brewers use to make good quality sake over there.
In Europe there is a lot of experimentation with local rice varieties that are most often used for Risotto or Paella, as these rice types have similar structures to sake rice and behave in a similar way.
In Australia, we are lucky enough to have a huge rice industry and a handful of varieties being grown that have Japanese heritage, such as Koshi-hikari and other varietals bred from it. No other sake rice is grown here yet, but we are hoping we can be part of helping that to change in the coming years.